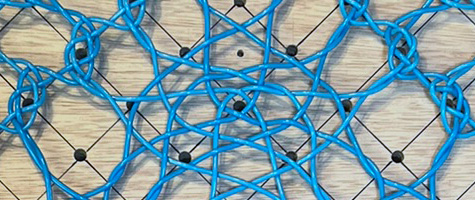
I had my eye on a bright blue wicker repair plastic material for a long time. The round plastic is designed for weaving and comes in long lengths, which made it seem perfect for XL bobbin lace. I just hadn’t found the right project to use it.
That opportunity came when I was invited to write a chapter on XL lace for Lace Design: From the Idea to the Finished Lace, an upcoming publication from Deutscher Klöppelverband e.V. The book brings together contributions from lacemakers around the world and will be published in German in April 2027.
Designing for XL Lace
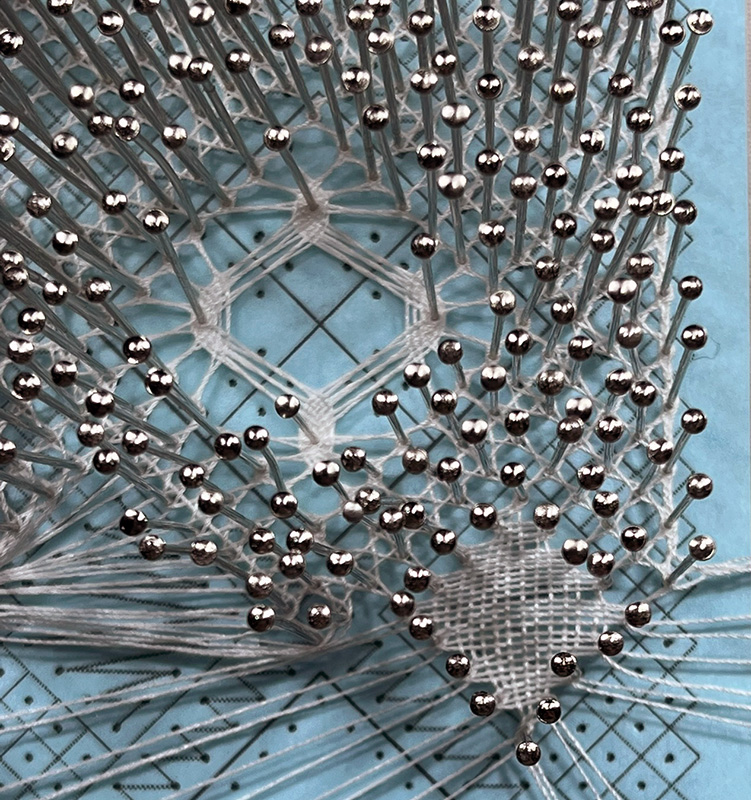
When I design lace, I keep returning to my favorite elements. For this pattern, I wanted something recognizable as my work while also changing things up a little.
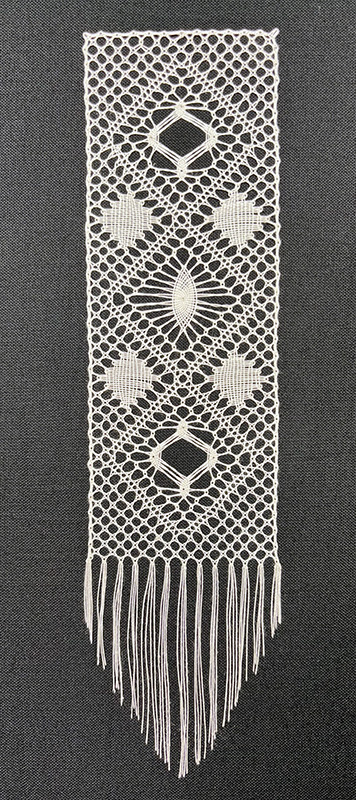
I designed three central spider motifs surrounded by a half stitch trail and added four diamond-shaped cloth stitch trails. I wanted the pattern to be interesting enough that another lacemaker would actually want to make it, but there was also something else to think about. This was a pattern for XL lace, which meant someone might use yarn, cord, plastic, or another unusual material. So, I avoided making the design too complicated.
Testing the Pattern
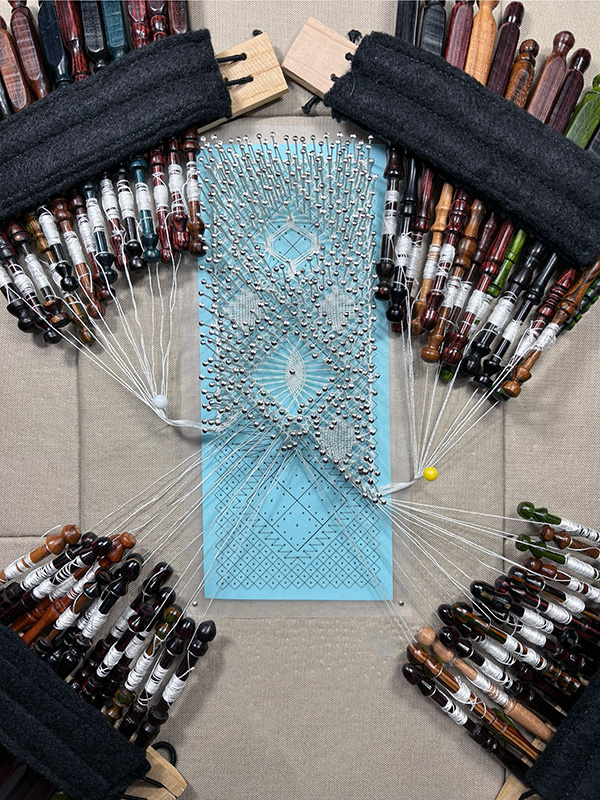
Before attempting the pattern in plastic, I made a sample in cotton thread. This allowed me to make sure the design worked before committing to the much larger version.
The finished cotton sample measured 5.5 x 2 inches, not including the hanging threads. Everything worked as planned. The spiders, half stitch trail, cloth stitch diamonds, and ground all behaved exactly as they should.
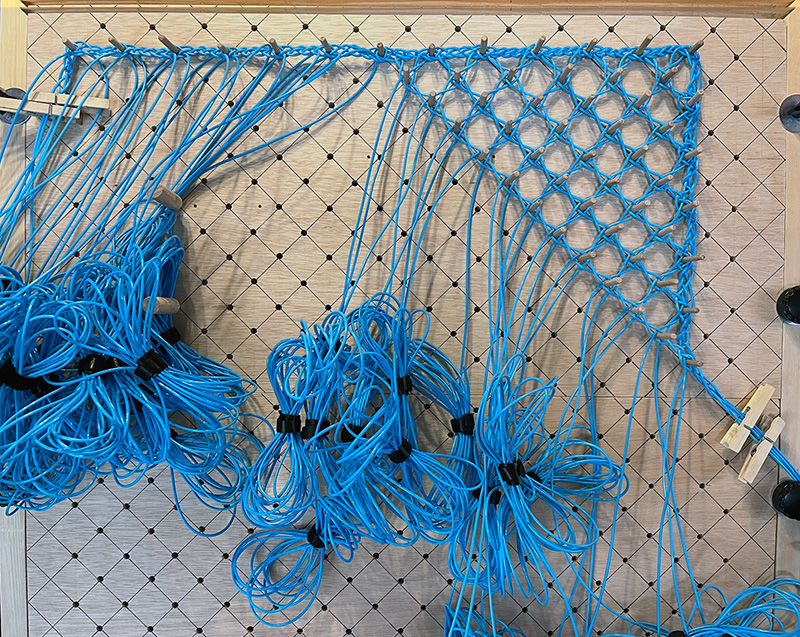
For the XL version, I planned to work the pattern at a much, much bigger scale. The lace might use the same crosses and twists, but would require very different tools. Instead of a traditional lace pillow, I worked on wooden boards drilled with holes on a 45-degree grid and small wooden dowels became my pins. The wicker repair plastic was far too large for traditional bobbins, so I folded the long strands into bundles and secured them with Velcro strips.
When the Material Doesn’t Cooperate
On paper, wicker repair plastic seemed perfect for lace. It was made for weaving, it could bend, and the 2.5 mm strands were available in long lengths. Unfortunately, being flexible enough to weave a basket does not mean something is flexible enough to make bobbin lace. I discovered the problem almost immediately when I tried to make the first cloth stitch trail. The plastic simply would not tension enough to make the stitches lie flat.
Fortunately, I had other stitch options. Half stitch uses fewer movements than cloth stitch and requires less space. This was better, but not great.
Wrestling with the Lace
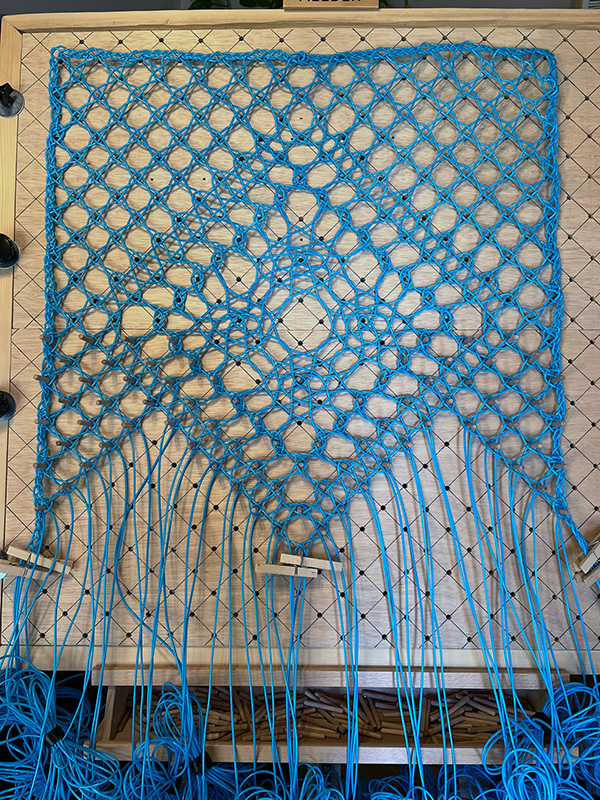
At first, I tried to tension the difficult motifs myself. I pulled and pulled on the plastic, trying to force the stitches into position. Eventually, I discovered exactly how much tension the material could take. I stretched one of the strands until it broke.
I repaired the break using a small piece of heat-shrink tubing. I used this tubing when finishing the lace I made with the nylon-coated speaker wire (Suspended Noise). The repair worked, but the wicker plastic did not take to the heat gun nearly as well as the speaker wire had. The plastic softened, became slightly melty, and lost much of its strength around the repair.
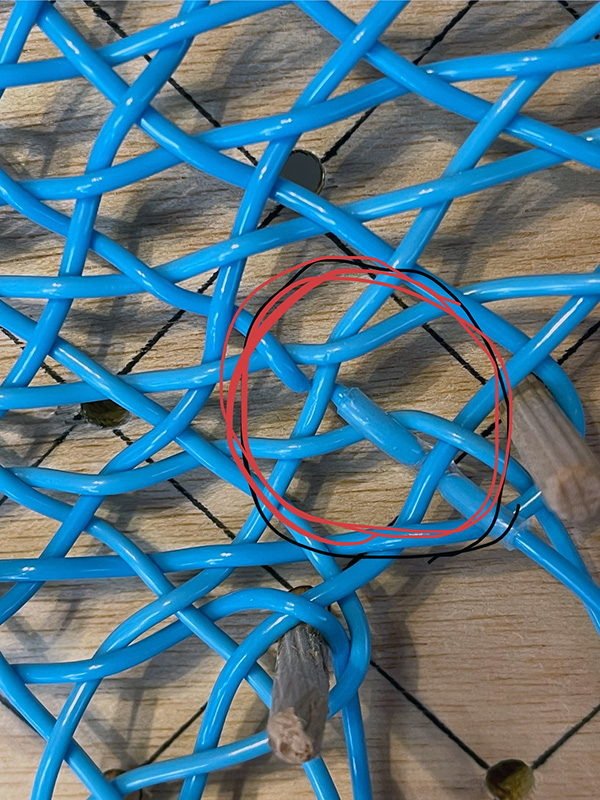
This meant I had a repaired strand that I couldn’t really pull to tension again. I carefully worked past the damaged area until I was far enough down the lace that I was no longer putting direct tension on the repair.
Making the stitches was only part of the challenge. Managing all the bundles of plastic was awkward. I moved them around the board just as I would move bobbins, but the long bundled strands tended to catch around each other.
An Extra Set of Hands
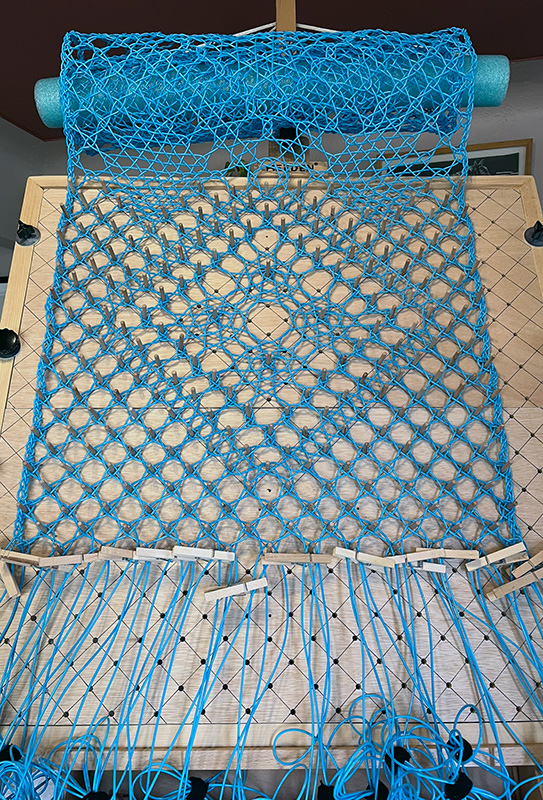
For the large spider and diamond trails, my husband became part of the lacemaking process. Instead of trying to make the stitch and then pulling everything into place, we pre-tensioned the strands. My husband held them in position and maintained the tension while I crossed and twisted the plastic to complete the motif. It was still difficult, but it worked.
This wasn’t how I expected to make the piece when I designed the pattern. Then again, very little about working with this material happened quite the way I expected.
Finishing the Lace
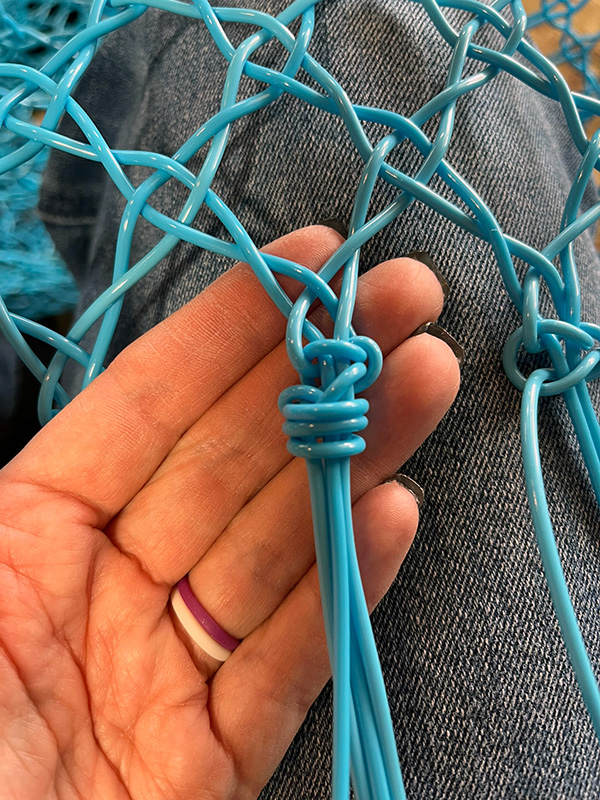
My original plan was for the bottom of the finished piece to look like the cotton sample. I would finish the lace and trim the remaining strands into a neat V. By the time I reached the bottom, I knew that wasn’t going to happen. Cotton thread hangs beautifully. The wicker repair plastic had other ideas. After spending the entire piece fighting its stiffness and tendency to go wherever it wanted, there was no reason to pretend I could suddenly make all those long blue strands hang in a perfectly behaved fringe.
I still needed to secure the pairs, but my usual overhand knot wasn’t practical with so much stiff material. I started looking at macramé knots and found one that I could make with the plastic and trust to hold everything in place.
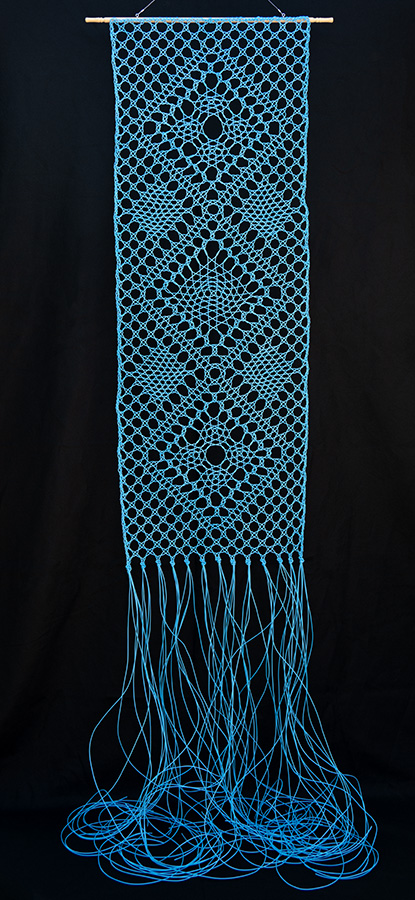
Instead of a neat V, the plastic thread twists, curls, overlaps, and pools on the floor beneath the lace. How much of the plastic collects on the floor depends on how high the artwork is installed. The lace is permanently attached to a wooden rod and can be suspended from a ceiling or a tall wall.
The complete installation measures approximately 12 feet tall and 2.5 feet wide, including the rod, worked lace, and hanging strands. The actual lace design is approximately 68 x 24 inches.
Effort in Form
Once the piece was finished, the title felt inevitable. Effort in Form. The material fought nearly every part of the process. I couldn’t use all the stitches I had planned. The bundles tangled. The plastic resisted tension. I pulled one strand until it broke, nearly melted the repair, and eventually needed another set of hands just to work the motifs.
Somehow, you don’t see that struggle in the finished piece. The lace is open, symmetrical, and orderly. The spiders and trails look like the plastic cooperated all along. Only at the bottom does the material finally get to behave entirely like itself, with blue strands in chaos beneath the lace.
I will not be making bobbin lace with wicker repair plastic again. Although, I’m glad I tried it once.
Effort in Form will be exhibited at the 43rd German Bobbin Lace Congress in Torgau, Germany, in April 2027, alongside the publication of Lace Design: From the Idea to the Finished Lace. Until then, you can find more of my experiments with lace, unusual materials, and works in progress on Instagram (@BobbinLaceNet) and TikTok (@CajahYupMe).