
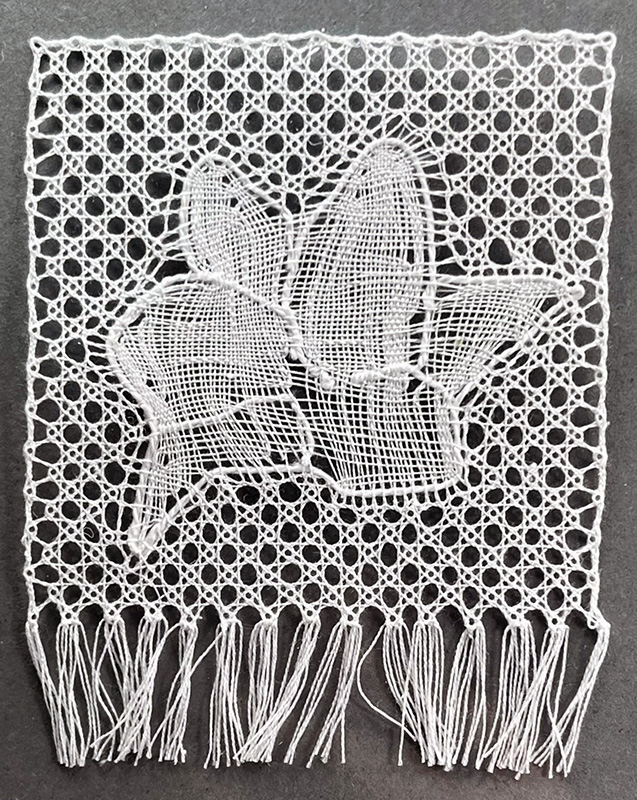
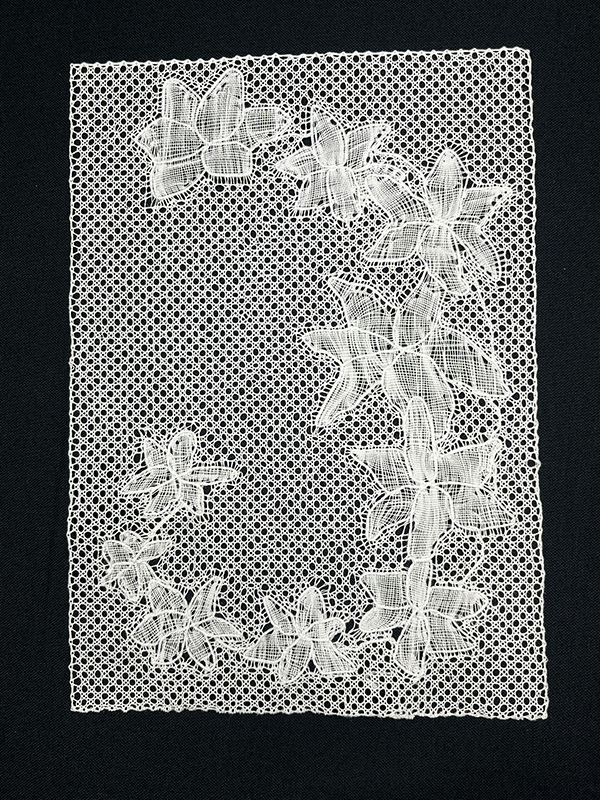
Utopia is the first of three bobbin lace pieces in Idealism, a triptych exploring the promise of a utopia and its inevitable descent into reality. Each piece uses the same floral design, but the lace gradually shifts from idealized beauty to instability and, eventually, fragmentation.
For Utopia, I wanted to begin with my idea of lace at its most perfect. In my mind, that meant a large, dramatic floral design worked in a technically complex lace like Flanders, Binche, or Valenciennes.
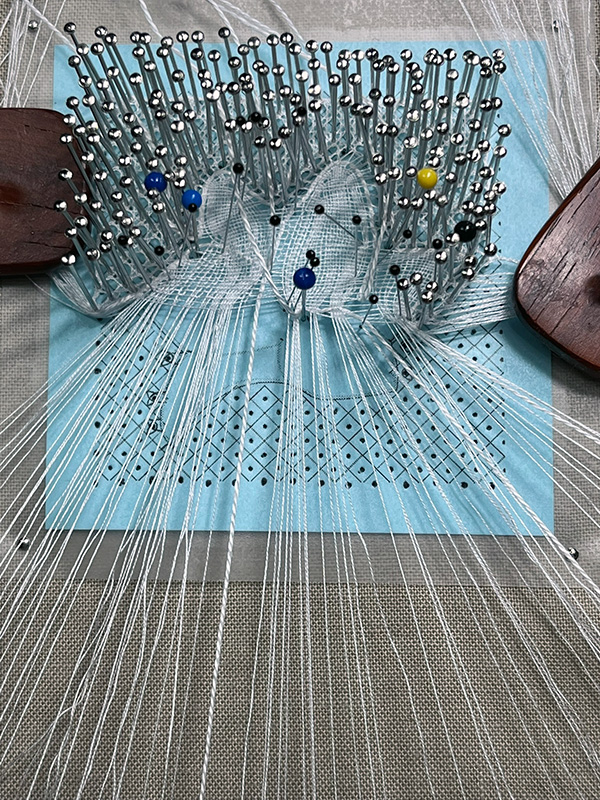
Choosing Flanders
To begin with, I don’t make floral lace. Most of my lace designs are geometric and symmetrical, so creating an elaborate floral piece was a dramatic shift from my normal design style. I ultimately chose Flanders because I love the logic of the lace and its fascinating ground. The intricate and drawn-out movements of the ground are just so satisfying.
Another challenge was that I’ve only taken one class in Flanders lace. Other than the samples I made during that class, I didn’t have much experience actually making Flanders, much less designing my own pattern.
Before beginning Utopia, I did an exhaustive study of Flanders lace and how patterns are constructed. This piece would essentially be my first time designing in Flanders and my first substantial Flanders lacework at the same time. Saying it was a learning curve seems like an understatement.
Designing the Flowers
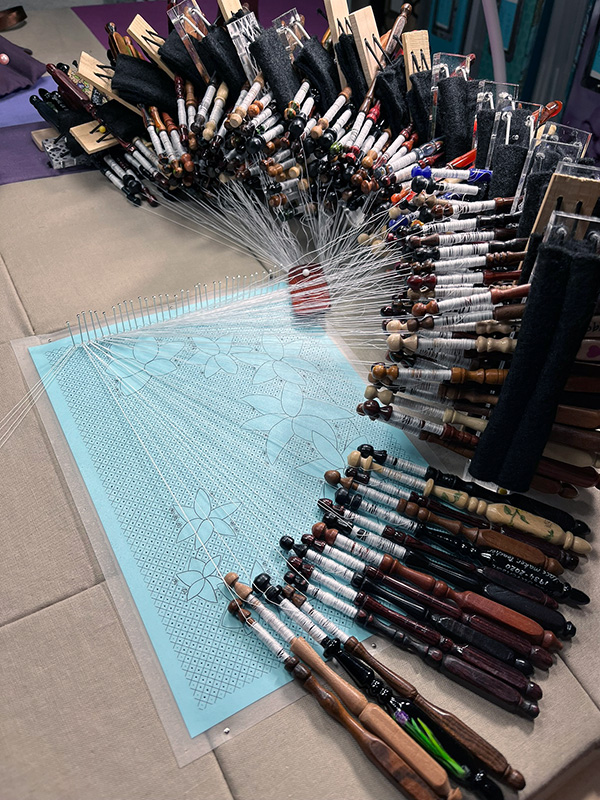
The original proposal for Idealism showed a spray of lilies as a placeholder until I could develop the actual Flanders pattern. I started by drawing flowers based on lilies, but after adjusting the shapes over and over to make them work in lace, they gradually began to resemble clematis. I look forward to my neighbor’s purple clematis blooming each year, so I was happy with the new shape.
I arranged the flowers using the golden ratio. Although the finished composition isn’t symmetrical, there is mathematical order behind the placement. That felt especially appropriate for Utopia, where even apparent irregularity follows an idealized structure.
Planning Flanders Close work
Flanders close work behaves very differently from the cloth stitch trails I regularly use in Torchon lace. In a Torchon cloth stitch trail, the same worker pair travels back and forth along a path. In Flanders close work, the worker changes at every new pinhole on each side. That meant I needed to plan the constant exchange of worker pairs throughout every flower.
Using Procreate, I enlarged my flower illustrations and digitally drew the paths of the threads through the close work. Starting at one side of the surrounding Flanders ground, I worked my way across each flower, determining where the pairs needed to travel and how to exchange the worker.
Even with all that planning, the drawings could only take me so far. Once I began making the actual lace, I had to deviate from my planned paths to create the right amount of density. Making each flower look full required a lot of concentration, trial and error, patience, and persistence.
Testing the First Flower
Before committing to the entire design, I made a sample of the first flower. The sample allowed me to test the pattern, thread, gimp, and Flanders ground before scaling up to the final piece. I’m glad I did. The gimp I originally selected was too small, and the flower petals needed additional adjustments. I made them rounder to create the fuller shape I wanted.
Thankfully, the Flanders ground worked relatively well, giving me a solid foundation for moving forward.
Doing Flanders Math
I purchased all three frames for Idealism before drafting the final lace pattern, so I already knew I had a 9.5 x 7.5 inch space to work with. I wanted the lace to be large enough to look substantial inside the frame, but not so large that I would be completely overwhelmed by the number of bobbins.
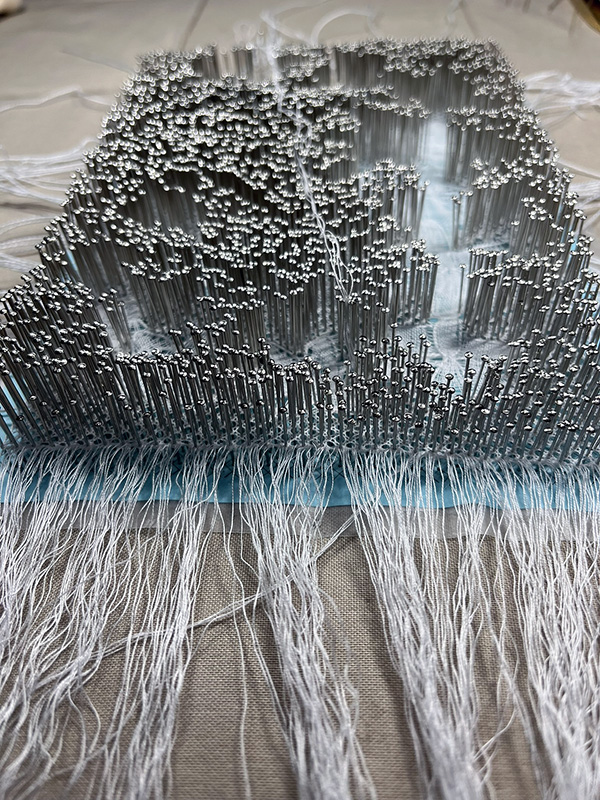
I already tested multiple potential threads and knew the grid size I needed to use. From there, it became a matter of Flanders bobbin lace math. Each pinhole across the top of the pattern requires four bobbins. By changing the number of pinholes across the pattern, I could calculate both the finished size of the lace and exactly how many bobbins I would need.
I kept doing the math until I found a balance I was willing to live with. The final lace would be approximately 5 x 7 inches and require 288 bobbins, or 144 pairs.
Managing 288 Bobbins
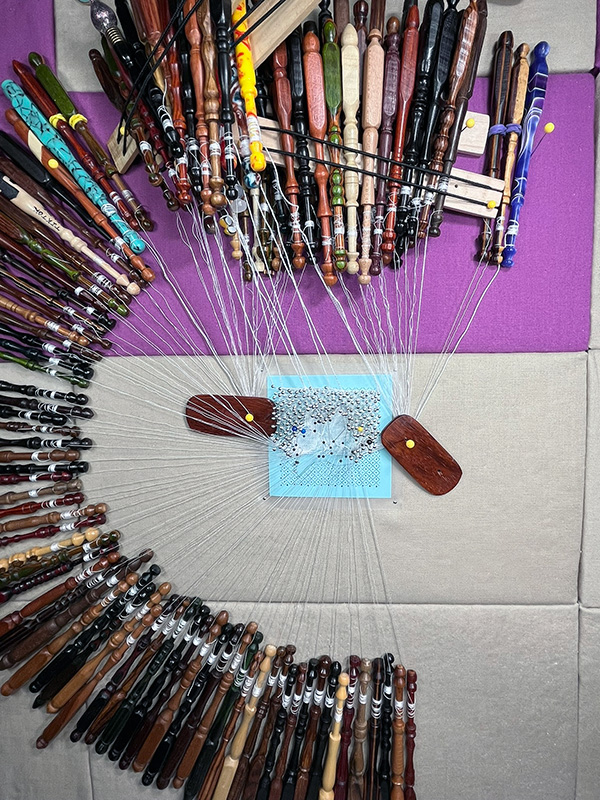
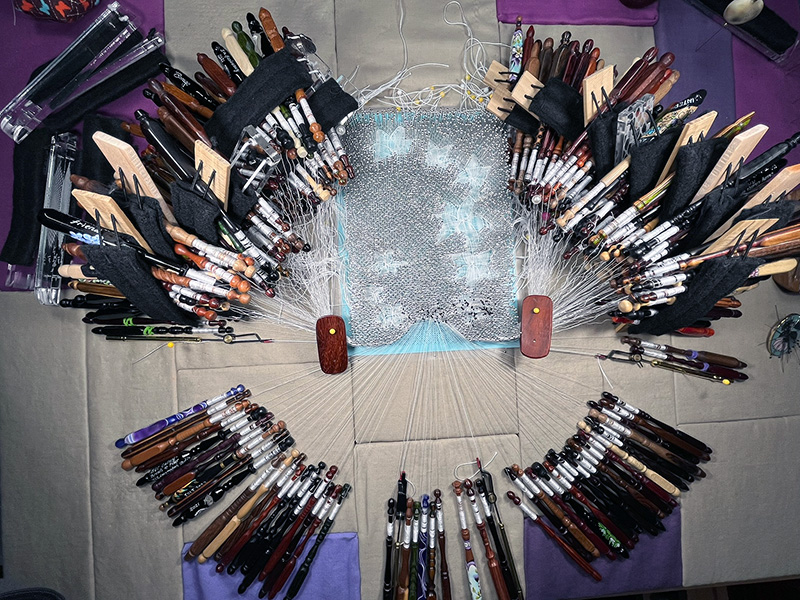
This was by far the most bobbins I ever used for a single piece of lace. I didn’t actually own that many. My husband was kind enough to lathe additional bobbins so I could make the piece as planned.
With that many pairs, bobbin management became an essential part of making Utopia. I used the largest block pillow I owned and modified my wooden bobbin holders by adding felt to the elastic. The felt helped keep the bobbins from sliding around or falling out of the elastic.
Most of the bobbins stayed bundled, stacked, and out of the way unless I was actively using them. This gave me as much working space as possible, but it also meant constantly unbundling the pairs I needed and carefully putting them away again.
The Illusion of Perfection
Utopia was easily the most technically difficult lace I’ve ever made. I chose a type of lace I had very little experience with, taught myself how to design in it, created a floral composition unlike my usual geometric work, planned the close work, and managed 288 bobbins to make it happen.
Utopia establishes the illusion of perfection. The next piece, Disillusion, begins to break it.
Want to follow along with my lace experiments and artwork? Check out my Instagram (@BobbinLaceNet) and TikTok (@CajahYupMe) for process videos and behind-the-scenes updates!