For a long time, I’ve been searching for a large gauge wire that’s flexible enough for bobbin lace. My goal is to create large scale lace sculptures that hold their structure but still look and behave like lace. Unfortunately, most of the wires I’ve tested have been too stiff to work with.
Still, I kept looking. And recently, I stumbled on something unexpected, speaker wire tucked away in one of my cabinets. It turned out to be exactly what I’d been hoping for.
Trying Every Wire… Until One Worked
Before discovering the speaker wire, I tested everything I thought might work:
Bailing wire: Incredibly stiff and sharp. I had to wear gloves, and it still poked holes straight through them.
Electrical wire: Slightly more promising thanks to its coating, but still too rigid to tension properly.
Both wires resisted every stitch, so it felt like I was wrestling the wire instead of making lace.
The speaker wire was different. It’s 16-gauge copper coated in nylon. It is a soft metal wrapped in a smooth, flexible sheath. Copper brings the pliability, and the nylon coating protects my hands and provides strength to the copper. I didn’t expect much when I first cut a length, but within minutes of testing, I could tell this was something special.
Preparing the Wire for Lace
Speaker wire comes as two attached strands, meant for separate audio channels. So, I separated them for double the amount of material. One strand even has a thin white line running along the nylon coating, giving a bit of color to the copper.
It was a no-brainer to keep the nylon coating. It helped the wire move smoothly through the ground. Unlike bare metal, which can snap after repeated bending, the coated copper held up even when I unlaced sections multiple times.
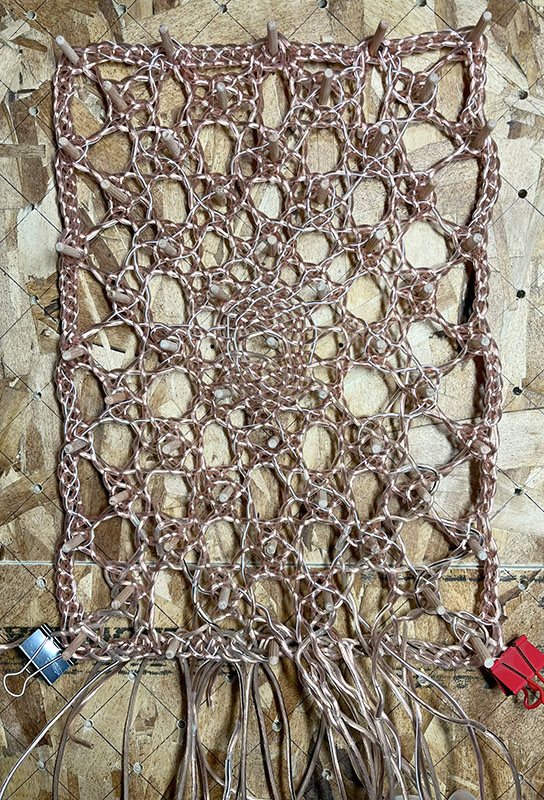
To manage the wire, I hung the lengths on my wooden pegboard. This is the same board I built for my grocery-bag lace, Pickup @ Store #5 displayed at the Denver Art Museum. I experimented briefly with Kumihimo bobbin holders. They worked well enough for this shorter test, but longer wires might be too much.
Why Use Flanders Lace?
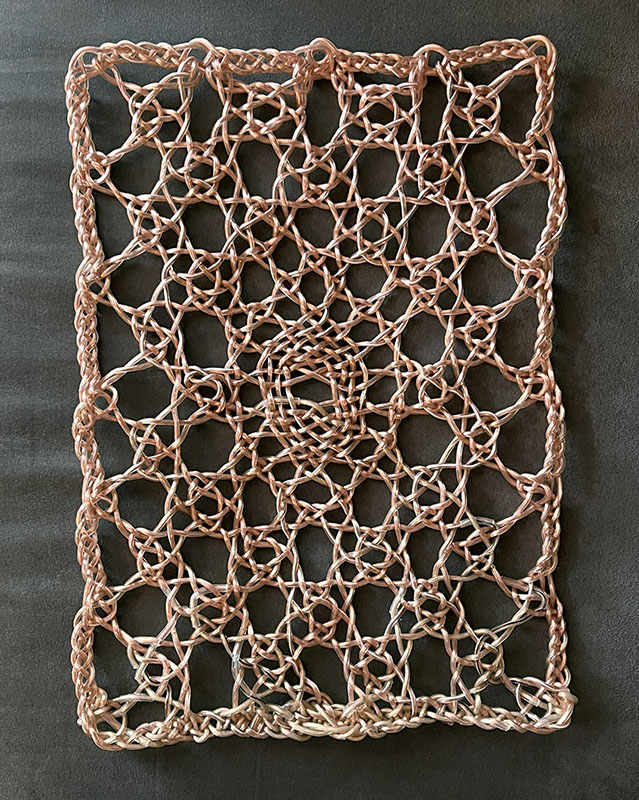
For this test, I designed a Flanders lace pattern. Flanders uses twice the number of threads at every pinhole, creating a dense, structured fabric. This makes it ideal for large wire lace, where open spaces can sometimes overwhelm the design.
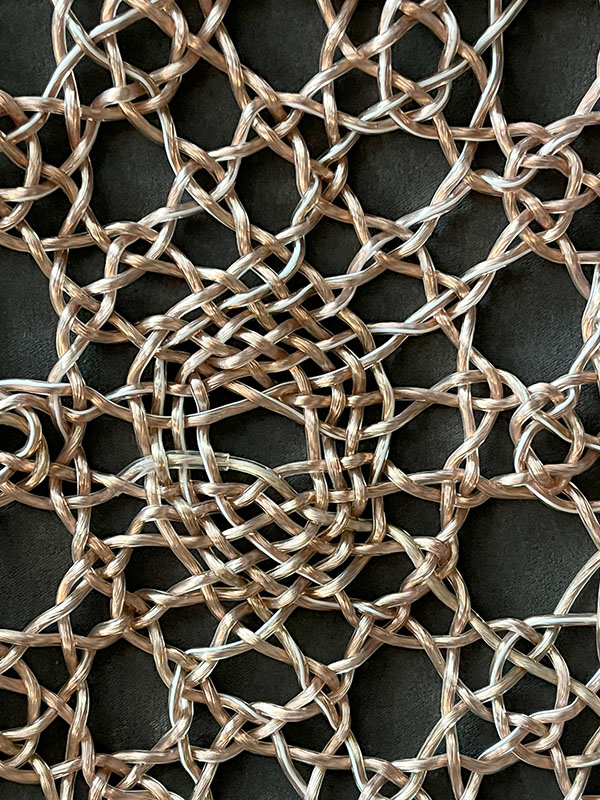
Thankfully, the wire handled the Flanders stitches beautifully. For the center motif I used a stitch combo called a ball or pea in Flanders, which you may know it as a spider. Even with the compact stitches of the motif, the wire coating never cracked or interfere at all.
Finishing the Lace
Finishing wire lace is always its own challenge. I used heat-shrink tubing to seal the ends together. It’s not perfect yet, but it’s a solid start, especially since this test is for a planned outdoor installation. The nylon coating and heat-shrink finishing should help the piece withstand weather and sunlight far better than bare metal.
The finished lace is:
- Very sturdy
- Slightly heavy
- Surprisingly pliable
Best of all, the copper catches the light beautifully. Also, there was no noticeable patina on the coating from being handled, which is a good sign for long-term outdoor use.
A Successful Test
This test was an absolute success. The speaker wire didn’t break, held tension well, worked smoothly through all the stitches, and did not hurt my hands. After so many failed attempts with other wires, finding a material that behaved like fiber, but had the strength of metal was very exiting!
I’m already know what I will do next. The flexibility and durability of the speaker wire opens the door for large outdoor lace.

Follow Along for More Lace Experiments
Curious about how this speaker wire test evolves into a larger piece? Follow me on Instagram (@BobbinLaceNet) and TikTok (@CajahYupMe) for behind-the-scenes videos and lace experiments in real time.