Flanders bobbin lace has always fascinated me. I love the density of this lace! Each pinhole uses double the number of threads, creating a weight and structure that feels both delicate and substantial. That characteristic makes it especially appealing for my next piece, large-scale wire lace. My earlier wire pieces turned out decent, but the open part of the structure was more visible than the lace. I believe Flanders will finally strike the balance I’m after.
Before I can continue sampling Flanders lace, I need to solve a problem that has frustrated me from the start, getting the grid size right. When I first sampled Flanders patterns, they were too large or too small for the thread I was using. Adjusting the grid each time meant working an entire pattern at the wrong scale, only to discover the motifs didn’t form correctly. As a beginner in Flanders lace, I couldn’t tell whether the issue was my skills or the pattern size.
Creating a Graduated Grid
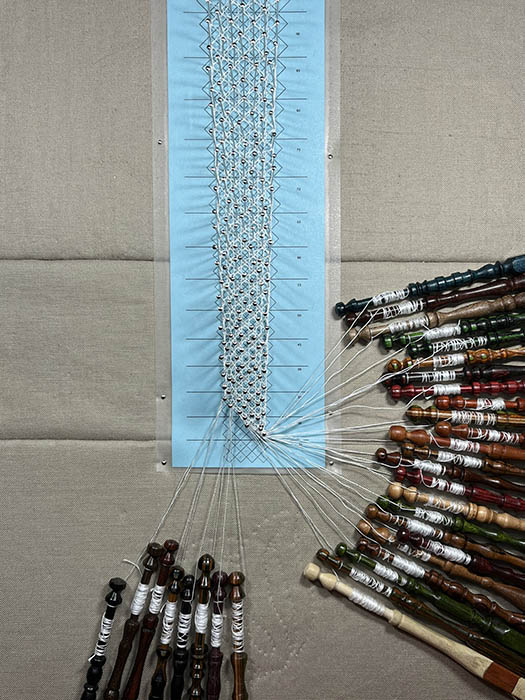
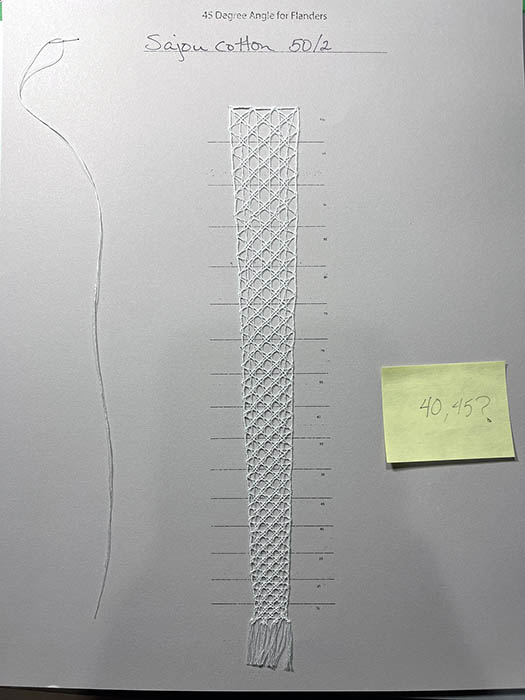
To answer that question, I designed a way to test each thread. I created a graduated grid that is only five pinholes wide and several rows tall. Each section is just large enough to show how the Flanders ground forms for that percentage of grid size, without the entire pattern being too big to repeat “quickly”. Of course, no part of making lace is exactly quick.
Using Adobe Illustrator and Photoshop, I took a section of my original grid (100%) and replicated it beneath itself multiple times, reducing the scale by 5% at a time to 25%. This gave me one compact pattern that contained multiple grid sizes in a single strip. This allows me to see how the same thread looks across many grid sizes.
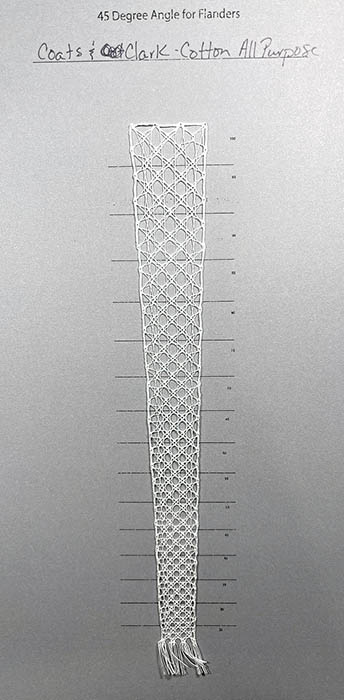
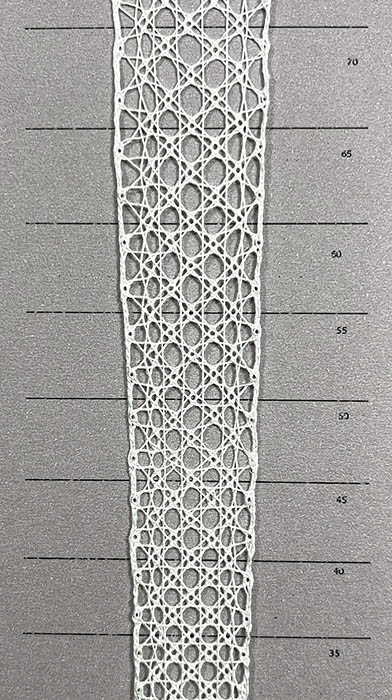
Each transition line on the pattern is labeled with its percentage, making it easy to identify where one size ends and the next begins. To display the finished samples clearly, I mounted them on cardstock pages labeled to match the grid steps. This lets me view the lace uninterrupted by pinholes and compare results side-by-side.
Testing the Threads
I began with the thread I had on hand, Coats & Clark sewing cotton, while waiting for proper lace thread to arrive. As expected, the sewing cotton wasn’t ideal. It’s usable in a pinch, but lacks the softness that Egyptian cotton lace thread provides. Still, it gave me a sense of how scale affects the structure of Flanders ground.
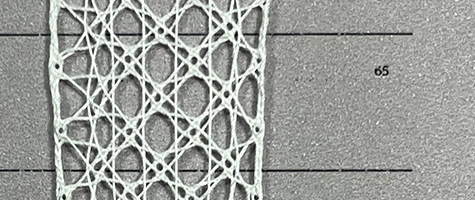
Once I switched to true lace cotton, it was easy to see why this thread was traditionally used. At 100%, the grid was too large, and the ground was not right. As I worked my way down the scale, the structure of the grid began to tighten. By the midpoint, the ground looked balanced, dense, and even. Continuing to the smallest section, the lace became too compact again, confirming the sweet spot lies somewhere in the middle.
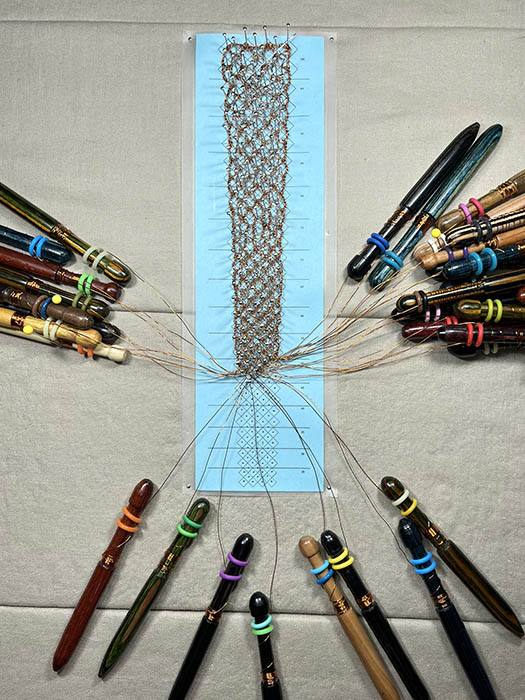
Then came the wire test. This was where starting large paid off. The thicker, less flexible wire behaved far better on the larger grids than the smaller ones. It revealed that my future wire lace pieces will need a grid closer to the upper end of my scale to preserve the ground structure.
These samples are now stored in a folder for future reference. It is a small but growing archive of threads sampled across multiple scales.
Lessons in Scale and Structure
This process clarified something that seemed intuitive, but hard to get exactly right. Thinner threads require smaller grids, but by how much varies dramatically. Seeing multiple scales worked in one continuous piece allowed me to observe the point where form and tension align and where they don’t.
It also answered my original question. My early struggles with Flanders lace came from the pattern scale and my technique. The graduated grid helped me separate the two, giving me a logical, repeatable way to find the right size before committing to a full pattern.
I’ve already started using this method to compare other threads and alternate materials. It feels satisfying to have a streamlined process for something that used to be pure guesswork.
Follow Along for More Lace Experiments
Want to see my process as I continue exploring scale, structure, and unconventional materials? Follow me on Instagram (@BobbinLaceNet) and TikTok (@CajahYupMe) for behind-the-scenes videos and updates from my lace making experiments.